How To Create Menus In WordPress
This tutorial will show you the basic steps in creating a menu in WordPress
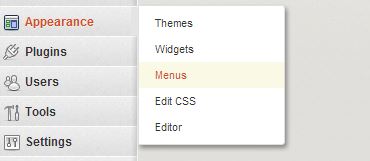
The first step you have to go on the left hand side hover by Appearance than click Menus

The second step is you will be taken to the menu page, click on the “Plus” sign than you need to choose a name for your menu
Just for this tutorial i choose the name “Test” but you can name your menu what ever you want.

The third step on the left hand side you will see Theme Locations widget on the Primary Navigation select your menu name and click save.

The fourth step, from here you will have the choice of what you want to add to the menu , you can add Pages, Categories and Custom Links.
If you want to add a page or categories fist click View All than make your Selection of the page/Categories you want than click Add to Menu

The fifth step you will be able to see what you have added , if they all look good go ahead and click save menu.
That’s it for creating a WordPress simple menu

On your Blog page you should now be able to see the menus you just created.

If you have any questions or concerns leave a comment or if you have a tutorials request


